You need a couple of pieces of hardware available before you can install DVBLink. You need an NAS, obviously, and it needs to be one from a list of supported devices. DVBLogic supports a wide selection of units from asustor, iomega, NetGear, Qnap and Synology, but you have to download the specific version from site and they’re, awkwardly, categorised by the type of processor in the NAS. See all digital home reviews.
DVBLogic DVBLink: installing a TV tuner
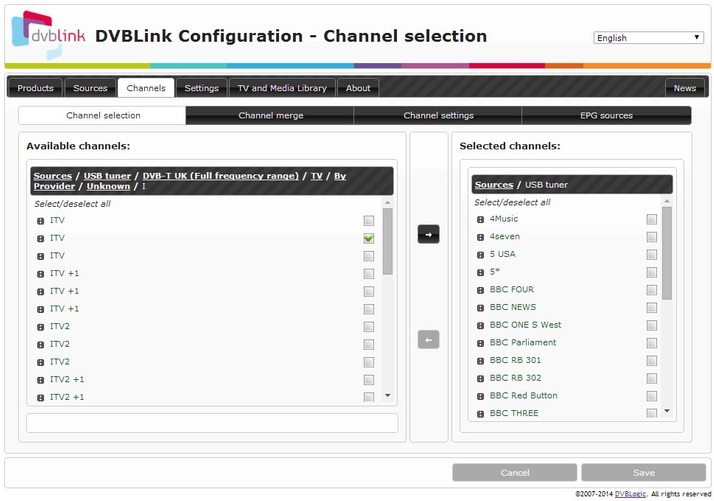
You also need a USB-based tuner for your intended TV source. This could be a terrestrial, satellite or cable TV device, but again, it needs to be supported by the DVBLogic software. DVBLink is not a fully-fledged consumer product. DVBLogic says it’s aiming at the ‘Prosumer’ market, which we tend to think of as early adopters of high-end technology. This product is more for the enthusiast, the kind of customer who tinkers with a Raspberry Pi and patches files in Python. It’s a multi-stage download and installation process. It could really do with a step-by-step installation guide or, better, a wizard to run through the most common installation settings. Although DVBLogic claims the DIY approach is to cater for the wide range of Electronic Program Guide (EPG) and Media Centre applications supported, there’s no reason they couldn’t be built into a simple set of multi-choice screens in an installation routine. More than that, when it comes to selecting channels, you have to go through, choosing them individually, from a list which shows between three and five instances of each. There’s no facility to go with ‘all of Freeview’ or ‘all of Freesat’, for example, which would make life a lot easier. See also: How to connect your iPad to an HD TV.
Setting up the DVBLogic DVBLink
We used a Synology DS214 NAS with twin WD 1TB hard drives. The operating system in this NAS uses a modern, multi-window design and once installed, the DVBLink server shows up as a package in the Synology Package Centre. As well as the server and TV source applications, you’ll need a third-party EPG and there are several free applications supported. You’ll also need a player and, again, there are several free applications you can use. Once the player is linked to the DVBLink server, you’re finally set to go. You can select from the channels you chose at installation to view and record directly to the NAS. If you have multiple devices, there are DVBLink clients for iOS and Android and suitable free players are available cross-platform. We tried XBMC on both PC and Android platforms. This worked fine, though on the small screen of our Samsung Galaxy S3 it was sometimes difficult to control the small buttons. The app is designed primarily for big screen TV use with control through a TV remote. See also: How to watch UK TV when abroad: watch Chromecast, Sky Go, iPlayer and more.
